Overview
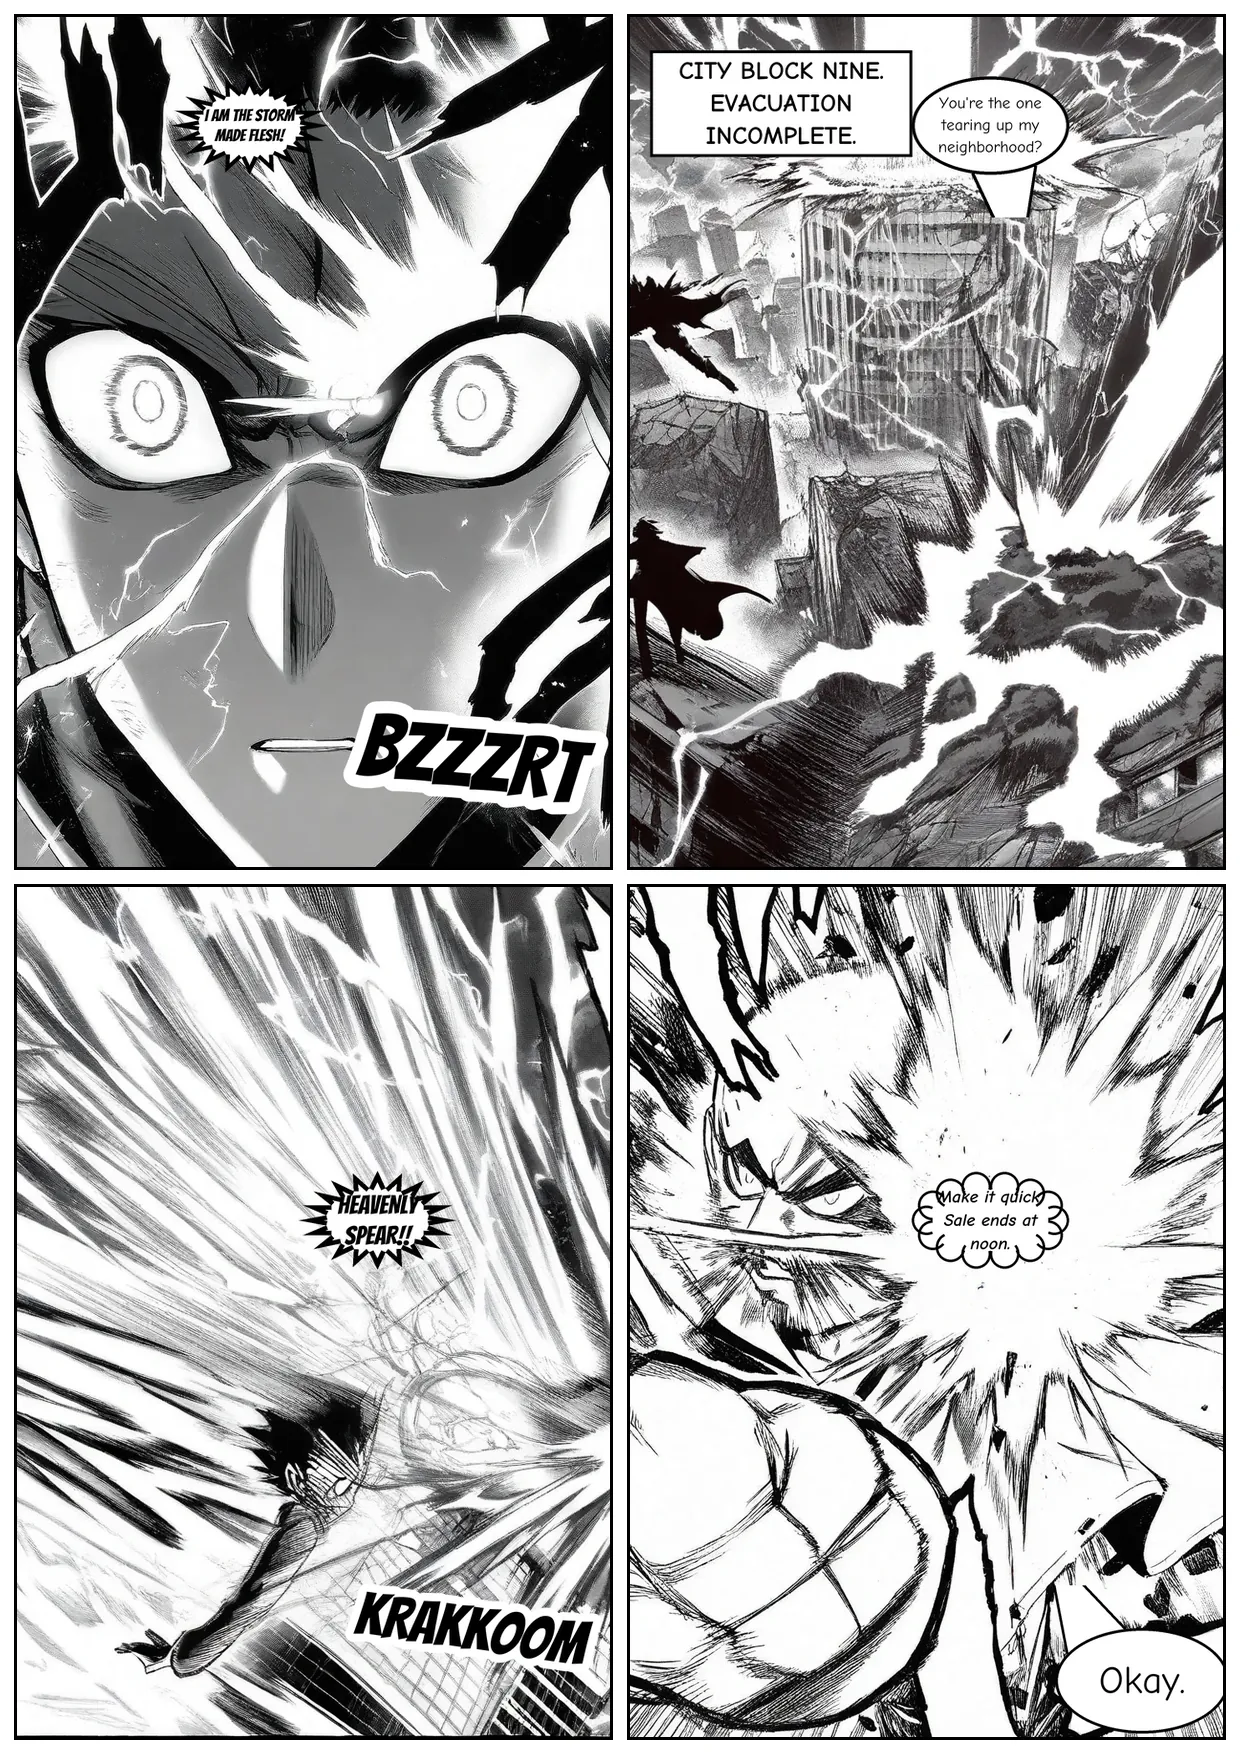
I like anime and manga enough that I kept coming back to the same question: why was there no model I could use to make a whole manga page instead of one decent-looking image? Closed models such as GPT Image 2 and Nano Banana Pro can make a convincing panel now and then, but I could not get the consistency, control, or quality I needed for a longer sequence. That is why I decided to build this.
Generic anime diffusion models could already make fighters, explosions, and dramatic faces. What they did not give me was the ink density, screentone, speed lines, dialogue space, or control over the colour treatment of a page. Prompting got me part of the way there, but it never gave me a look that held together from panel to panel.
I started with a manga site I already use for reading. I considered using one of the ready-made datasets I found online, but it did not include the series I wanted. So I wrote a small Firecrawl scraper, collected the page images myself, and ended up with 6,982 One-Punch Man pages across 200 chapters. For Demon Slayer, I worked from 934 pages across 46 chapters of the Digital Colored Comics.
The training stack was Illustrious-XL v0.1 for the base model, Magi for panel and text detection, WD14 for image tags, and Kohya's sd-scripts for training.
Results at a Glance
- I trained both adapters beyond the selected checkpoint, then compared the saved images from the same prompts and seeds at each step. The two I kept are rank-32, alpha-16 LoRAs for Illustrious-XL v0.1, each about 228 MB, selected at step 1,800 because that was where the results looked strongest without becoming weird or unstable.
- For the monochrome One-Punch Man run, I sampled about 600 pages from 6,982 pages across 200 chapters. That gave me 940 candidate panels; after cleaning and filtering, 337 training panels remained.
- For the colour Demon Slayer run, I reused the same pipeline on 934 pages across 46 chapters of the Digital Colored Comics. The smaller source pages needed a lower size threshold, and the captions kept useful colour tags instead of forcing a black-and-white look.
- I checked the outputs myself across different subjects and aspect ratios. This was a visual, qualitative review, not a formal benchmark or a blinded study.
- Once a panel is generated, a CPU-only pipeline adds dialogue bubbles, lettering, and page composition. It works from the generated image rather than asking the diffusion model to draw readable text.
| Detail | One-Punch Man (black and white) | Demon Slayer (colour) |
|---|---|---|
| Source corpus | 6,982 pages, 200 chapters | 934 pages, 46 chapters |
| Prepared data | About 600 pages sampled; 594 processed; 940 crops; 337 retained | 934 colour pages; retained-panel count was not recorded |
| Caption policy | Added monochrome and greyscale tags so the model learned a black-and-white look | Kept useful colour tags and did not add monochrome tags |
| Minimum panel side | 512 px | 360 px; the source pages were smaller |
| Training run | 2,000 steps | 2,400 steps |
| Selected checkpoint | Step 1,800 | Step 1,800 |
| Selected adapter | ~228 MB LoRA | ~228 MB LoRA |
Collecting Pages Was Only the First Step
I had plenty of source images, but a folder full of manga pages is not automatically a training dataset. A page can have empty space between panels, jumbled panels from different scenes, dialogue layered over the art, tiny reaction panels, covers, captions, and even a two-page spread. If I trained straight on those pages, I would risk teaching the adapter that one requested panel should look like a collage of unrelated images with random fake writing on top.
The project did have a generic TypeScript image preprocessor, but I did not use it for these runs. It centre-crops images to fixed ratios, which makes sense for some datasets but is a bad fit for manga.
Manga panels are often intentionally off-centre, unusually tall, or very wide. A crop can remove the impact point, a character at the edge, or the speed-line geometry I actually wanted to preserve.
Kohya already supports aspect-ratio buckets, so I could keep each useful panel in its original composition instead of forcing it into a centre crop.
After the panels were processed, I trained both adapters on those prepared images with the SDXL-family Illustrious-XL v0.1 checkpoint.
I Trained on Panels, Not Pages
For the black-and-white run, I sampled about three interior pages from each of the 200 chapters instead of sending all 6,982 pages through the detector.
I skipped covers and end pages, then spread the sample across the whole series. That gave the dataset different fights, locations, characters, and layouts without turning panel extraction into most of the project.
I used Magi v1, a manga object detector, to find panel and text regions.
For detection, it read a grayscale copy of each page. The crops themselves came from the full-resolution original, so the training images kept the line detail of the source art.
I first tried Magi's fp16 mode, but it mixed float32 image inputs with float16 model weights and failed with a tensor-type error.
Since the RTX 4090 had 24 GB of VRAM, I ran Magi in full fp32 precision instead. It was stable and fast enough, so there was no reason to keep forcing the broken half-precision path.
The run processed 594 pages, wrote 940 panel crops, reported no failures, and took about 4 minutes 24 seconds.
I Removed Letters but Kept the Compositional Space
For every text region Magi found inside a panel, I painted that region white before saving the crop. In practice, that meant removing the dialogue and lettering while leaving the surrounding art and most bubble space in place.
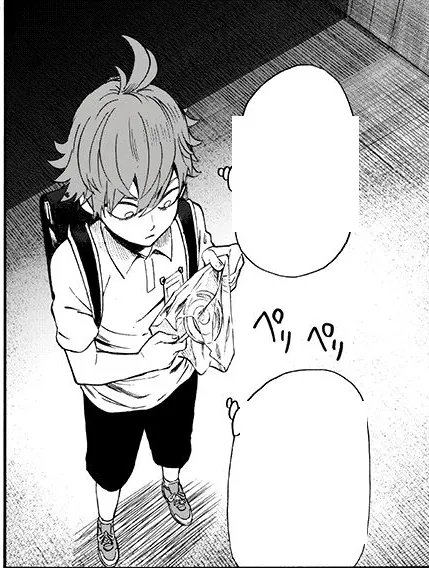
I did this because a diffusion model does not learn to spell from manga dialogue. It learns that letter-shaped marks are part of the image, then produces unreadable fake text in later generations. Removing the text from the training panels gave the model less reason to do that.
That was the point of the cleanup: the model could learn the artwork and composition without being trained to reproduce the text as well.
This did not mean the final manga had to be silent. It meant the model only made the artwork, and regular graphics code added readable text afterward.
After extraction, I ran a small Python validation script over every panel. It rejected unreadable files, removed panels below the minimum size, checked for near-duplicates with perceptual dHash and a Hamming-distance threshold of eight, and capped the long edge at 1,152 pixels.
For One-Punch Man, the 512-pixel minimum reduced 940 candidate panels to 337 retained panels. The script rejected 612 panels for being too small; it found no corrupt files and no near-duplicates.
The Demon Slayer source pages were smaller, so I lowered that minimum to 360 pixels for the colour run. Using the same threshold for both sets would have thrown away too much usable art from Demon Slayer.
I Made Style and Content Separable in the Captions
I tagged the retained OPM panels with WD14 SwinV2 v3 at threshold 0.35. The recorded 337-image pass took about 29 seconds. WD14 supplied Danbooru-style content tags for subjects, poses, expressions, and visible scene details. I then added the stable trigger and mode anchors. A monochrome caption began like this:
mrtmanga, monochrome, greyscale, solo, open mouth, 1boy, male focus, sweat, shoutingThis is a training caption, not a normal image-generation prompt. The short tags help the LoRA separate the parts that should stay consistent, such as the style and colour mode, from the things that can change from panel to panel.
I trained with caption shuffling and keep_tokens 1. That setting keeps the first tag, mrtmanga, fixed at the front while the descriptive tags can move around. This gave the model two kinds of information: the trigger said which adapter behavior to invoke, while the content tags explained what varied from panel to panel. Without that distinction, the model could think the style only belongs to the characters or scenes it saw during training.
For colour, I used a separate dsmanga trigger. It is simply the keyword for the Demon Slayer adapter, so the model knows to use that colour style instead of the black-and-white One-Punch Man one. I removed the forced monochrome tags and kept useful colour tags. At inference, I copied that policy: monochrome terms were positive for OPM and negative for Kimetsu, while colour language moved in the opposite direction.
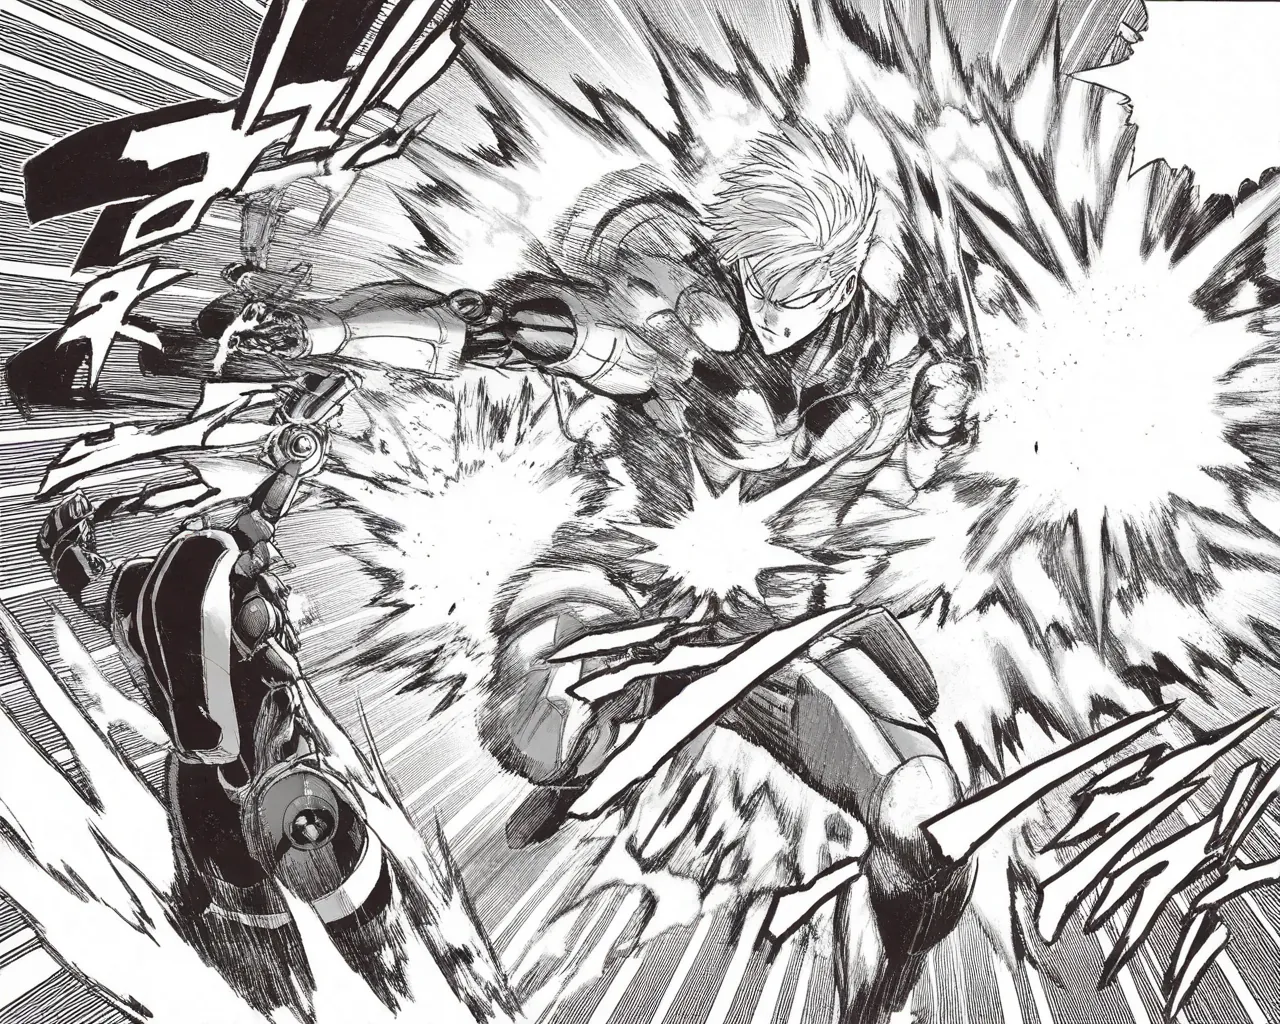
mrtmanga, monochrome, greyscale, 1boy, cyborg, short blond hair, mechanical arms, charging energy cannon, action pose, explosion, speed lines, dynamic angleMy Training Configuration
I trained on a RunPod RTX 4090 with 24 GB of VRAM. The pod also had 64 vCPUs and about 503 GB of system RAM. The container had a 20 GB root disk and a larger network-mounted workspace volume, so I kept the model cache, dataset, and outputs on the workspace volume. The base model was Illustrious-XL v0.1, a 6.9 GB SDXL checkpoint downloaded from Hugging Face. Because the workspace is network-mounted, loading that checkpoint took roughly four to five minutes.
The training environment ran on CUDA 12. I pinned onnxruntime-gpu==1.19.2 because newer versions expected CUDA 13 and would not load on this machine. I also installed the small set of ONNX, Magi, WD14, and Diffusers dependencies the pipeline needed. The two final LoRA adapters were about 228 MB each.
The Training Recipe
Here are the settings I used to train the models:
| Setting | Value |
|---|---|
| Trainer | Kohya sdxl_train_network.py, networks.lora |
| Rank / Alpha | 32 / 16 |
| Resolution | 1024 with aspect buckets 512–1,536 |
| Batch size | 2 |
| Precision | bf16 training, fp32 VAE (--no_half_vae) |
| Optimizer | AdamW8bit |
| Learning rates | UNet 1e-4, text encoder 5e-5 |
| Schedule | Cosine, 100 warmup steps |
| Extras | min_snr_gamma 5, noise offset 0.05, SDPA, gradient checkpointing, cached latents |
The Sixty-Step Insurance Policy
Before the full monochrome run, I ran a 60-step sanity job. A sample produced at step 40 was already a clean monochrome bald, caped figure, the base, trigger, captions, sampling, and network configuration were connected correctly. It also measured about 1.50 seconds per iteration, which let me size the real run from a measurement rather than a theoretical throughput estimate that would not have included the exact driver, library versions, storage behavior, or trainer settings on that rented machine.
The full 2,000-step run held around 1.50–1.52 seconds per iteration after model load, used about 10.1 GB of VRAM (of 24 GB), reported loss near 0.10 with no OOM or NaN failures, and spent about 50 minutes stepping. A larger batch might have fit, but fitting more work into memory was not itself a goal, once the measured speed met the budget and training was stable, there was little value in introducing another variable.
I Selected Images, Not the Largest Step Number
It is tempting to treat the last checkpoint as the deliverable. I instead saved checkpoints and fixed-prompt sample grids every 300 steps and reviewed them as a ladder:
| Checkpoint | Observed behavior on fixed prompts |
|---|---|
| Step 300 | Style elements were emerging, especially explosions and speed lines, but faces and anatomy were still loose |
| Step 600 | Stronger face, cape, and radiating burst |
| Step 1,200 | Improved anatomy and costume detail without obvious artifacts |
| Step 1,800 | Selected: sharp ink, correct costume cords, full style, generalizes to a full-body monster above city ruins |
| Step 2,000 | Retained, but no observed advantage over 1,800 |
I chose this checkpoint based only on how good the generated images looked to me, not on a benchmark score. A stable loss near 0.10 told me the monochrome run was healthy, but it did not score anatomy, texture, framing, or usefulness. The color ladder ran to 2,400 steps and also favored 1,800.
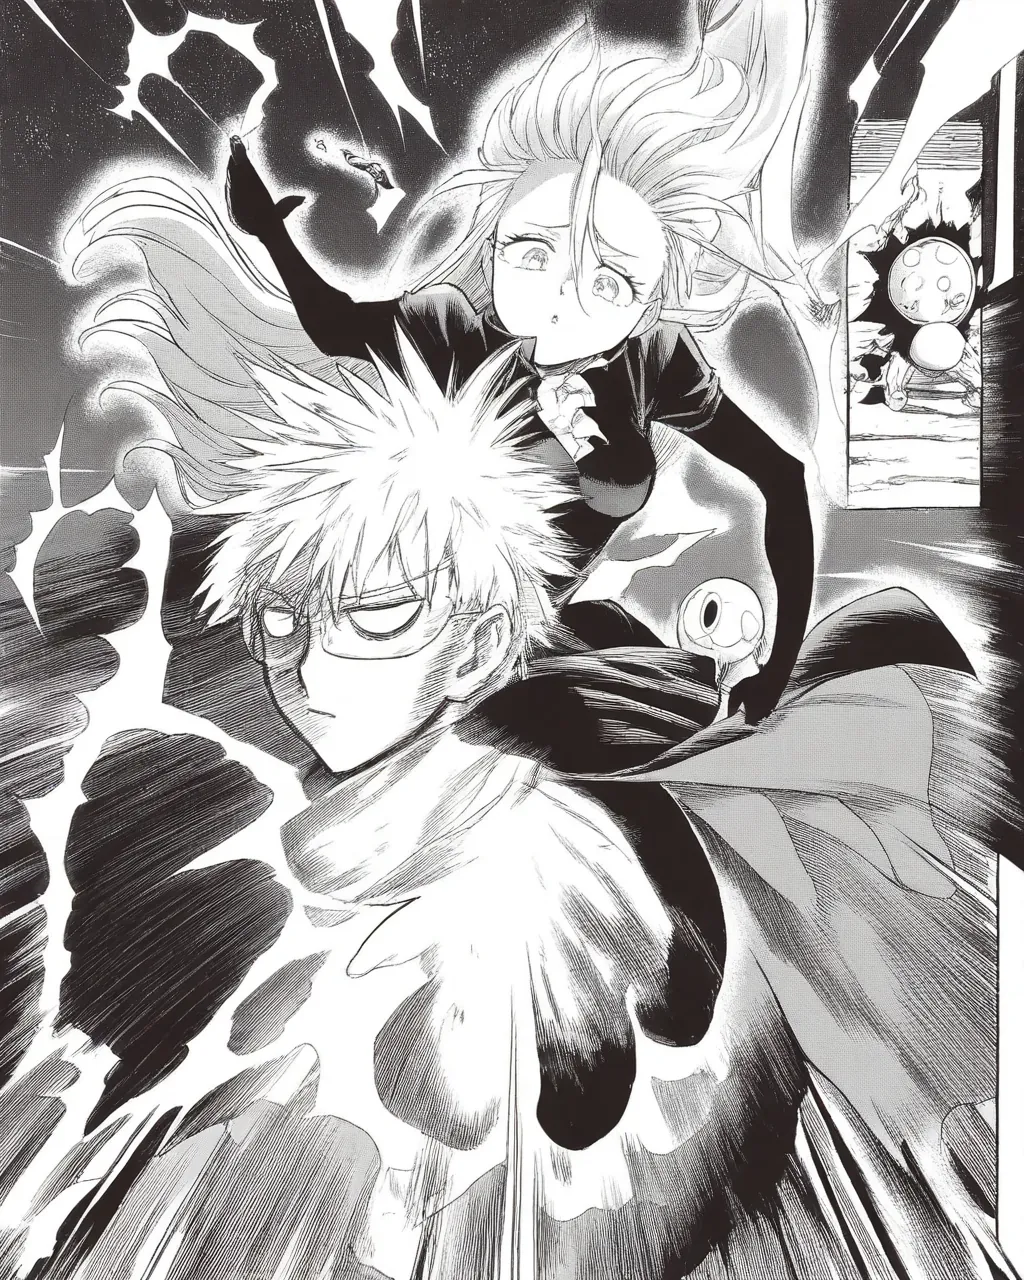
The OPM showcase used Diffusers with the LoRA fused at scale 0.85, Euler ancestral sampling, 30 steps, and classifier-free guidance of 6.5. Eight prompts covered a caped hero, a cyborg, a monster over city ruins, a punch impact, an esper, an aerial clash, a rooftop ninja, and a close-up face. I split the showcase across different subjects and aspect ratios to look for obvious brittleness beyond one familiar portrait. The outputs below are generated examples from that showcase; they are not source panels, training examples, or proof of comprehensive generalization.
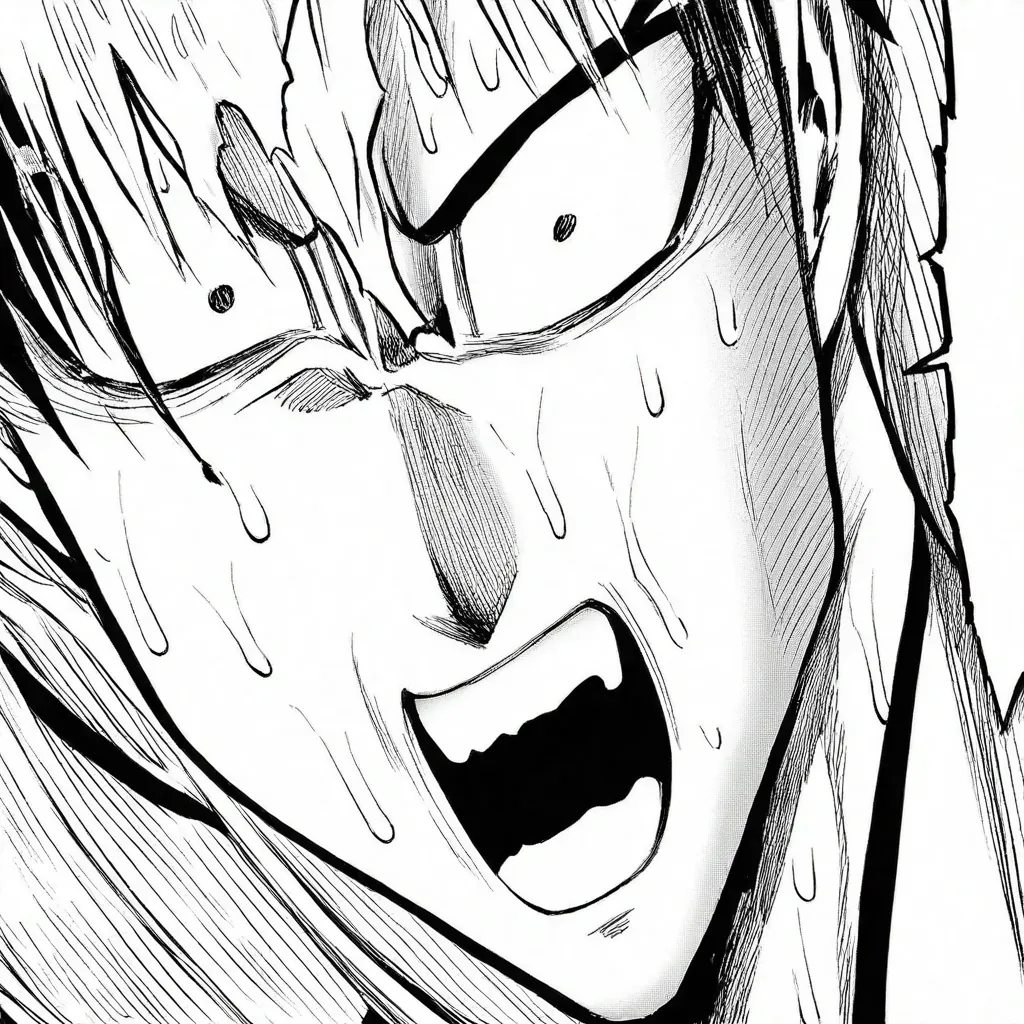
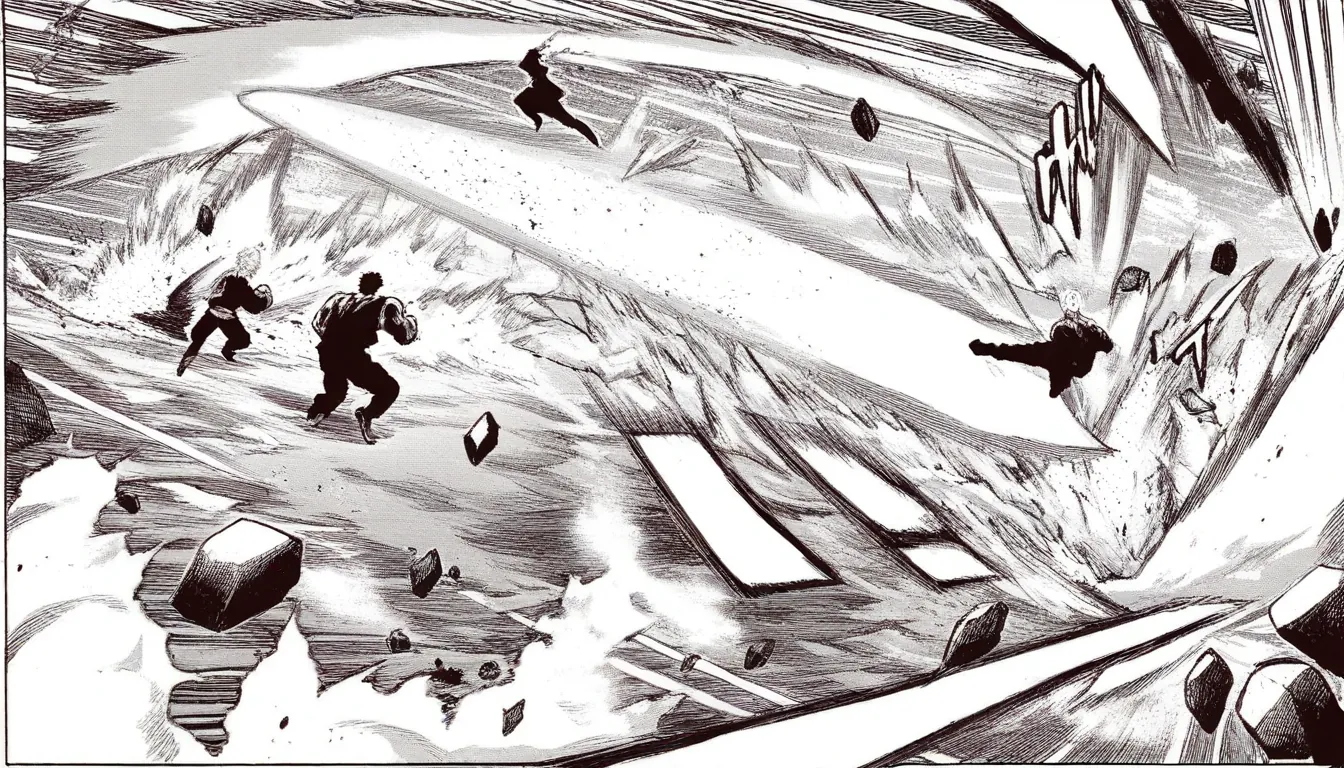
I Retargeted the Pipeline to Color Instead of Forking It
For the Kimetsu run, I kept the same detector, tagger, trainer, base, and evaluation pattern. Magi already detected from a grayscale representation while the crop came from the full-color original, so I did not add color-specific extraction code. I changed the source-size floor (512 to 360 px), trigger, caption anchors, prompt polarity, output names, sample prompts, and training budget. Those are narrow configuration points rather than a second architecture.
The result is useful evidence that my pipeline can support at least these two paged-comic modes. It is not evidence that the same extraction stage handles long-strip webtoons or every experimental page geometry. Those formats still require a different slicing decision before they can enter the shared preparation stages.
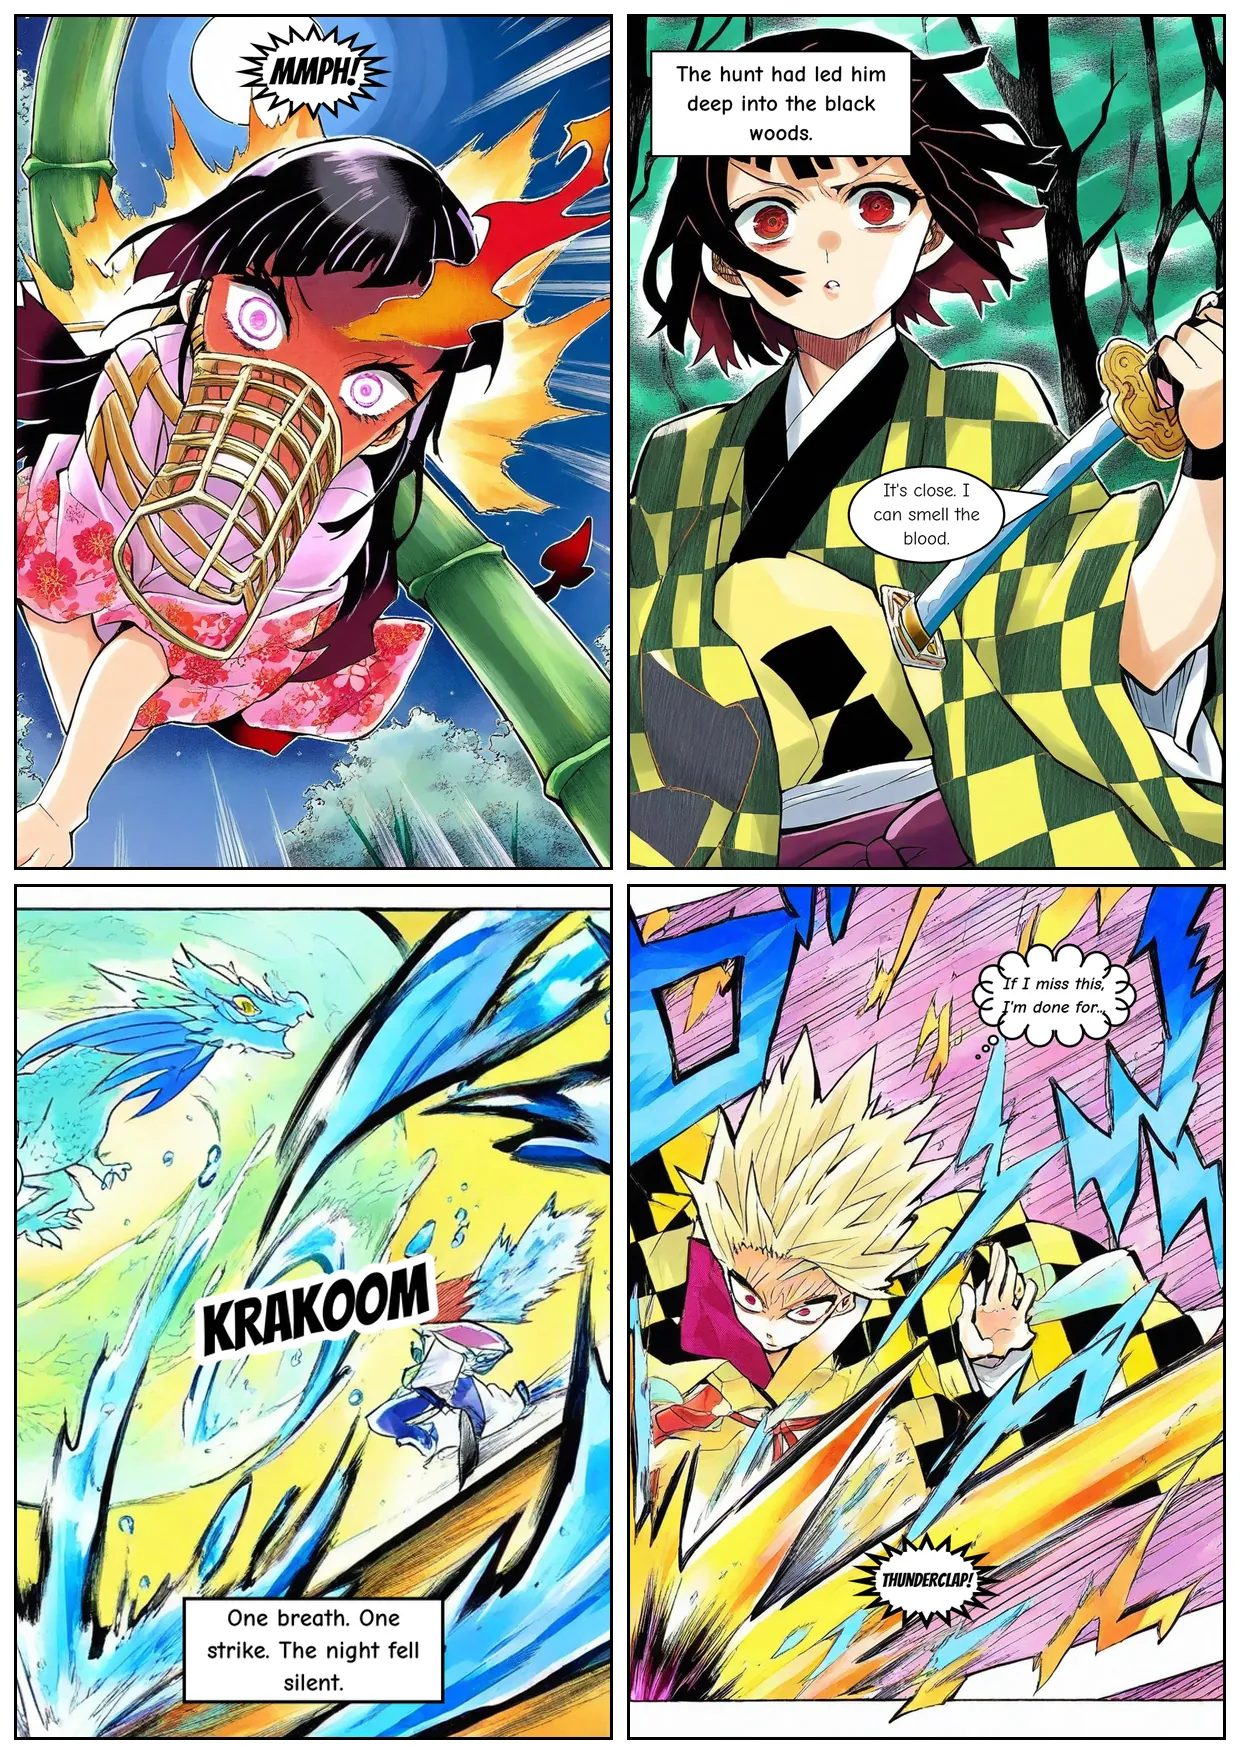
I will try to make the color adapter a lot better in the next iteration, and the new run I am already doing is showing clear improvements over the version used in this blog.
System Design: Two Connected Production Lines
The implemented flow, from raw pages to a composed page, looks like this:
- CollectCollected paged manga images → sample or select source pages
- DetectMagi panel and text detection → full-resolution panel crops
- CleanDialogue-region whiteout → size, corruption, and dHash filtering
- CaptionWD14 content tags → trigger anchors (mrtmanga mono / dsmanga color)
- TrainKohya LoRA on Illustrious-XL → checkpoint grids → qualitative review → step-1,800 selection
- GenerateDiffusers showcase and panel generation with style-matched prompts
- LetterCrop panel to page-slot aspect → resolve bubble boxes → render typography
- ComposeAssemble panels into bordered, guttered B5 pages with reading order
Two ordering details in that flow are load-bearing. First, panels are cropped to their page-slot aspect ratio before lettering. If you letter first and crop later, a bubble near an edge gets cut in half. Second, dialogue stays as structured JSON until the very last render step, so it can be edited, validated, translated, or regenerated without rerunning the image model.
The lettering pipeline first checks whether the generated panel already contains an empty bubble. This is a fortunate consequence of the data preparation strategy: extraction removed letters but preserved many bubble shapes, so the LoRA sometimes generates clean containers on its own. OpenCV searches for near-white connected regions, then filters candidates by area, solidity, ellipse fit, and the presence of a dark border ring. The border check distinguishes a bubble from a white sky, wall, or highlight. Suitable bubbles are ranked and assigned according to the configured reading order, right-to-left for manga or left-to-right for western layouts.
When no useful bubble exists, the placement code constructs a low-detail map. Candidate regions score better when they are flat and bright, and worse when they overlap speaker boxes, existing bubbles, or predicted caption zones. Placement is biased toward the top of the panel, reflecting manga-oriented layouts, but explicit normalized coordinates always take precedence. That hierarchy is a strong interface: an author can pin a bubble exactly when composition matters, allow detection to reuse model-created space, or fall back to automatic placement for speed. Automation does not erase control; it fills in missing information.
All coordinates use normalized values from zero to one. A speaker box such as [0.55, 0.2, 0.95, 0.8] survives resizing because it describes a fraction of the image rather than fixed pixels. The same JSON can therefore remain the source of truth across previews, final renders, and a future browser editor.
Drawing Dialogue Bubbles with Code
The renderer supports five dialogue kinds:
| Kind | Shape | Lettering treatment |
|---|---|---|
| Speech | White ellipse | Tail aimed toward the speaker box |
| Shout | Jagged star | Heavier outline, all-caps |
| Thought | Scalloped cloud | Shrinking-circle tail |
| Narration | Rectangular caption box | Per-kind maximum font size |
| Sound effect | No container | Large outlined text over the art |
Fonts are centralized in a small registry. Comic Neue handles regular speech, its bold and bold-italic variants cover emphasis, narration, and thoughts, and Bangers handles shouts and effects. All bundled fonts are SIL Open Font License assets, making them safe to redistribute with the repository. Restyling the whole lettering system means changing files and one registry rather than editing rendering logic throughout the codebase.
Text fitting is solved with measurement. The renderer computes a usable inner rectangle, wraps words based on Pillow's text bounds, and binary-searches for the largest font size that fits. Per-kind maximum sizes keep narration boxes from becoming absurdly loud simply because a panel is large. Shapes are rendered at three times the target resolution and downsampled with LANCZOS filtering for cleaner edges.
The compositor includes splash, horizontal and vertical two-panel layouts, several three-panel and four-panel layouts, and a four-row yonkoma option. A template can be selected explicitly or suggested from panel count and an intensity hint. Right-to-left mode flips order within rows rather than blindly mirroring every part of the page.
The JSON schema carries the page template, reading direction, image path, future image prompt, dialogue kind, speaker label, optional speaker box, anchor, and optional exact bubble box. Strict validation and tests protect that contract, because the specification is the bridge among writing, generation, lettering, composition, and a future editor. A worked example defines a four-panel right-to-left page titled "Just a Hero" that combines thought bubbles, narration, speech, a shout, and a sound effect over four generated images. It shows that the schema represents more than a single caption pasted onto one image.
On MPS, float16 caused black outputs at larger resolutions, so the local generator used bfloat16. VAE tiling also corrupted portrait images while landscape images remained healthy; removing tiling and retaining slicing fixed that failure for images up to the documented size limit.
Even process monitoring lied. A shell watcher based on pgrep -f sdxl_train_network.py matched its own command line and continued reporting that training was active after the real process had ended. The reliable completion signals were the final safetensors artifact and released VRAM. This is a small incident, but it captures an important point: monitoring should verify the state you care about, not a string that happens to correlate with it.
What the Measurements Actually Tell Us
The training report contains several useful measurements: 594 pages processed, 940 extracted panels, 337 retained examples, a 29-second captioning pass, 2,000 training steps at roughly 1.5 seconds each, about 50 minutes of stepping, and a 228 MB selected adapter. On the rented machine, the card listed around $0.40/hour, and the full extraction-to-showcase workflow fit within a one-to-three-hour working window.
Those numbers show that a focused LoRA experiment can be small enough to iterate on without a dedicated cluster. Training a focused LoRA does not have to be very expensive. Rental pricing changes, network-volume performance varies, cache state matters, and setup failures can consume more time than training.
The qualitative evaluation deserves the same careful reading. Fixed prompt grids made checkpoint comparison more consistent, and eight showcase prompts tested subject range. There is no formal human-preference study, held-out similarity metric, typography benchmark, or broad prompt suite. For a personal engineering project, visual review was a reasonable checkpoint-selection method because the target was visual style; for a reusable research benchmark, it would not be enough.
IP and Publication Boundaries
I built this to learn how image generation works and to see whether I could train a small model of my own. I trained these adapters from artwork associated with third-party creators and manga properties. The technical process does not grant permission to redistribute protected source pages, panel datasets, base weights, characters, or commercial products. I cannot say whether the adapters can be used commercially to make manga of your own. The training art belongs to other creators, so those ownership and usage rights are not mine to grant.
The same tooling can support less contentious applications. A creator could train on work they own, build a lettering assistant for original art, or use the deterministic dialogue layer without any learned style adapter.
The Takeaway
The headline result is easy to repeat: one rented RTX 4090, 337 cleaned panels, roughly 50 minutes of training, and a compact style adapter. But the more durable result is architectural. The system improved when each component was allowed to do the job it was actually good at.
Magi found panel and text regions. Pillow prepared images and rendered typography. WD14 produced tags aligned with the anime-oriented base. Kohya trained the adapter. Diffusion generated artwork. OpenCV found empty bubbles and low-detail placement regions. A JSON schema connected writing, lettering, and page composition without requiring any one component to understand the entire product.
That decomposition also made failure legible. A bad crop belongs to extraction. Garbled tags belong to captioning. Weak style belongs to training or checkpoint selection. A clipped bubble belongs to crop order. Broken glyphs are avoided entirely because the image model is never assigned the typography job in the first place.
Finally, I learned to judge every layer by its own evidence. A loss curve verified training health. Fixed grids supported a checkpoint choice. Generated examples showed qualitative behavior. Tests and fixtures verified lettering and composition. None of those, alone or together, proves a production product. They do give me a coherent, reproducible stack and a precise list of what I still have to connect. For builders, that is the real invitation: do not begin by asking whether one model can produce the final artifact in a single pass. Ask what information must remain editable, what operations should be deterministic, and where probabilistic generation genuinely adds value.
Weights and Code
The trained adapters are on Hugging Face: the One-Punch Man monochrome LoRA and the Demon Slayer color LoRA. Both are part of the Manga Finetuning LoRA Collection, which gathers every adapter from this project. The full source code is on GitHub.
Methodology and Limitations
Based on: two LoRA training runs (One-Punch Man monochrome and Demon Slayer color) on a single rented RTX 4090, the project's extraction, preparation, captioning, training, generation, lettering, and composition scripts, and their committed run logs, fixtures, and tests. All figures in this post are generated outputs or composed demo pages from that pipeline.
Limitations: no formal benchmark, blinded human study, or standardized style metric was run; checkpoint selection was qualitative. The web generation endpoint and browser editor are unfinished, and character consistency across panels remains unsolved. Adapters were trained on third-party manga artwork and are documented as local research results, not redistributable products.